
Follow these steps to add widgets to your Project Dashboard:
- Open the Dashboard
- Log in to your .STUDIO instance.
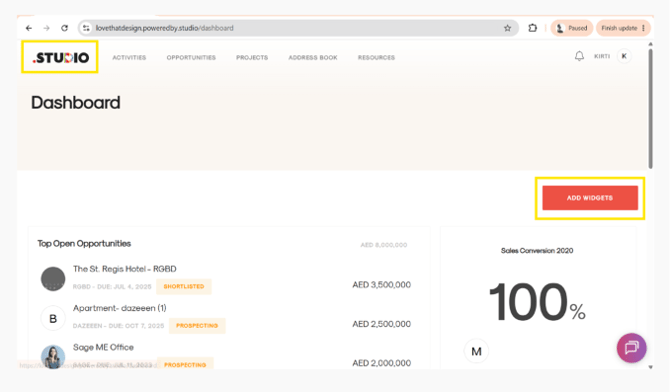
- Click the .STUDIO logo in the top-left corner of the screen.
- This will take you to the Dashboard.
- Open the Widget Library
- On the right side of the dashboard, click Add Widget.
- This will open the Widget Library.
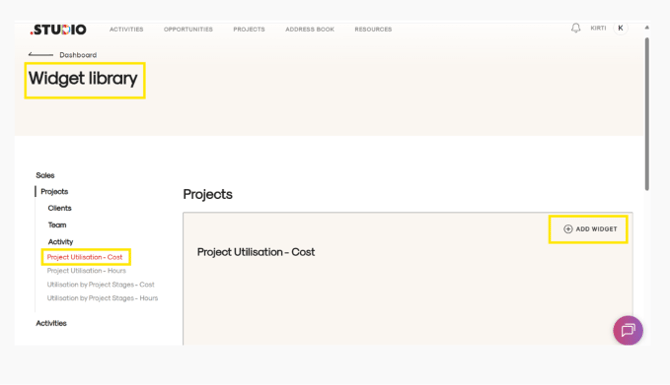
- On the left side, you will see widgets grouped under categories such as Sales, Projects, and Activities.
- Select and Add a Widget
- Choose the widget you want to add.
- Hover your mouse over the widget card.
- On the top-right corner of the widget card, click + Add Widget.
- Choose the Dashboard Location
- The system will ask where you would like to add the widget:
- Home Dashboard
- Activity Dashboard
- Opportunity Dashboard
- Project Dashboard
- Select Activity Dashboard.
- The system will ask where you would like to add the widget:
- Configure the Widget
- A configuration window will appear.
- Select the required details.
- Click Add to Activity Dashboard.
Widget Will Be Successfully Added to Activity Dashboard